Showing posts with label decor. Show all posts

Tuesday, April 24, 2012

Butterfly Garden Themed Party

I used this theme for my daughter's 3rd birthday.  It was girly, colorful and modern! 
Invites & Envelope Seals

Invite Closeup

Dessert Table Setting

Cake topper designed to match the invites

Wednesday, November 30, 2011

Christmas is Here: Ready, Save, DIY Decorate!

I have been receiving inquiries about easy and affordable DIY Christmas decorations, so I have done my research and compiled the cutest ideas out there...be inspired and decorate for the season!


Holiday Card Holder from Katy Did & Kid 

Recycled Newsprint Wreath from Crafty Crafty


Button Ornaments from L'Atelier
Modern Paper Ornaments from Design Sponge
Pinecone Trees from Good Housekeeping

Paperback Christmas Trees from Kayla Aimee

Felted Sweater Wreath from Recover Girl
Pucker Up Ornament by Good Housekeeping
christmas kissing ball craft

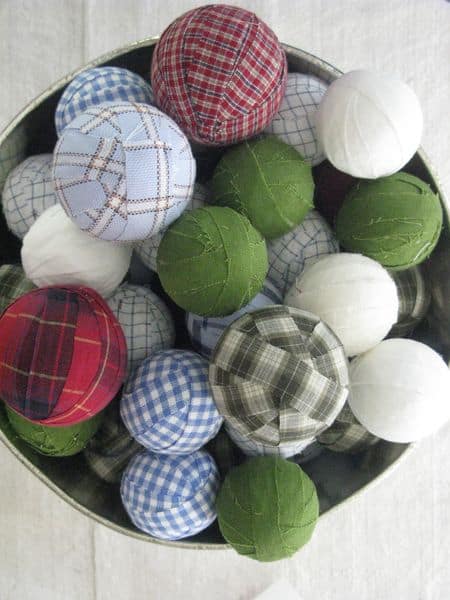
Fabric Covered Ornaments by Eddie Ross
Pine cone ornaments from Good Housekeeping
Pinecone Window Garland

Wednesday, November 16, 2011

Kids Artwork Display!

My children bring home the cutest artwork from school, but it is impossible to keep all of them.  I had read somewhere about scanning or taking pictures of the artwork before recycling it, and had I been doing that for a while.  Today I came across the best use for those pictures and I know all of you are going to LOVE IT as much as I did!
Jen from  jengrantmorris.blogspot.com took the pictures of her kids artwork and created a photo collage with them...put them in simple Ikea frames and hanged them in her kids bedroom...the result: modern and clutter free! 
If you are obsessed with organizing like I am: you are going to do a happy dance after you see this pictures :)


And here is how it looks on the wall:


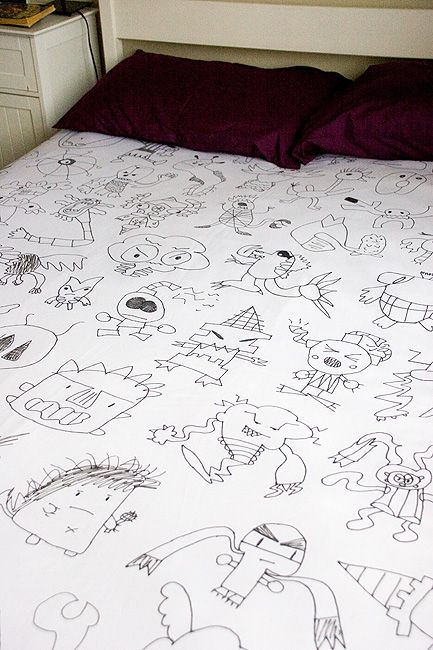
Isn't it wonderful?  This artistic lady did not stop here...she created an awesome duvet cover with her son's sketches! Check out how she did it here
Photobucket

Monday, September 12, 2011

Cake toppers!

Look at these colorful cake toppers made out of craft foam. They fit on top of a regular store bought cake, and can be disassembled for storage and keepsake.  
Contact me for pricing information.

Cute Idea: string spheres!

These string spheres can be made to match any decor!


Gather up:

  • Big balloon
  • Sharpie
  • Scissors
  • Cotton yarn
  • 4 oz. White school glue
  • 1/2 cup of Corn starch
  • 1/4 cup of Warm water
  • Something to stir with
  • Petroleum jelly
  • Clear fast drying spray paint
  • Hanging lamp cord or fishing line (depending on your desired final product)
  • Container for mixing

Directions

1. Blow up a balloon. We kind of suggest not blowing it up to its maximum capacity so that it is rounder. We've also heard that an exercise ball works great if you want a huge globe!
2. After the balloon is inflated to it's desired size draw a circle with the sharpie around the balloon knot just large enough to accommodate whatever lighting method you choose. Note: If you are just wanting to hang the balls or use them in a vase then you don't need to leave a hole at all!
3. You will need to prepare your work area by laying down a tarp. We hung a shower curtain between two chairs and suspended the balloons by it with string so we could have plenty of working room.
4. Mix corn starch, glue and warm water together until it's not lumpy (too bad getting rid of cellulite isn't this easy). 
5. Smear the petroleum jelly all over your balloon until it is completely coated. Note: We specifically left using rubber gloves out of these instructions. You should get messy. If we were concerned about keeping your hands clean this would have been called the "loveliest, merriest and whirliest DIY" not "messiest, merriest and whirliest DIY".
    6. Besides sharing in good company, it will go much faster if you have a friend help you with this. One of you begin feeding the yarn through the glue mix and handing it off to the other person to drape around the ball.

    7. Tuck the start and end pieces of yarn beneath other pieces of yarn. Begin wrapping the yarn around the balloon vertically at a comfortable tightness, and gradually switch to wrapping horizontally.

    8. After your ball has dried for 24 hours, you can pop the balloon! Use a chopstick to knock out any glue crystals that developed between strings.
    9. Spray the ball with clear fast drying spray paint outdoors.


    Credits: Wednesday Custom Design